Merch
In Deathbulge: Battle of the Bands the usable items are part of the game's special merch and stock system. Instead of the usual game mechanics of stocking up on a specific amount of each unique item, and the inventory limiting the range of objects you can have, this system allows you to access the whole range of items in any given situation.
In this case, a merch is not one piece of an item but a concept of a useful knick-knack. After acquiring a merch, it will always be available in unlimited quantity – but you have to spend stock to use it. Therefore each merch only has to be obtained once.
Stock is a form of currency that you have to spend to use the collected merches. Each merch has its own stock cost depending on how powerful it is. All merch share the same limited stock pool that can be upgraded by stock expansions.
After using up stocks, you can manually restock by interacting with Bocks.
List of Merch
You can collect merches by purchasing them with bops from shops, getting them as rewards for finishing side gigs, and opening treasure chests.
| Icon | Name | Stock | Effect | Obtained from |
|---|---|---|---|---|
| Gentle Barry's | 1 | Heals an ally for 33% of their max life. | Gifted by Saeva when first meeting her. | |
| Hearty Barry's | 2 | Heals an ally for 66% of their max life. | Purchased from Pec in The Wet Beak in Claire's Hair | |
| Bountiful Barry's | 3 | Heals the entire party for 33% of their max life. | Purchased from Evil Goods in Hoho | |
| SIDD X | 1 | Restores 33% of an ally's max hype. | Purchased from Band Goods in Bopstead | |
| SIDD X2-TURBO | 2 | Restores 66% of an ally's max hype. | Purchased from Pec in The Wet Beak in Claire's Hair | |
| SIDD X-TR3M3 | 3 | Restores 33% of the entire party's max hype. | Found in the en suite porta potty in the bottom left corner of Camping A at Hellblivion | |
| SIDBARRY Premium Vintage | 6 | Heals the entire band for 66% of their max life and hype. | Purchased from Pec in The Wet Beak in Claire's Hair (after beating Pokalyps) | |
| Emergency Horn | 4 | Brings a knocked out bandmate back into battle at 25% life. | Treasure near Ian's house | |
| The Y'allmighty | 6 | Brings a knocked out bandmate back into battle at 50% life. | In Bass Basement, right beside Chuckridge Cuttlebrander | |
| Clearbuds | 4 | Remove all measure effects from the player's bar. | Rewarded for finishing the Gillian's Request Side Gig | |
| Silenceblaster | 4 | Remove all measure effects from the enemy's bar. | Rewarded for finishing the Shut Your Mouth Side Gig | |
| Hair Dryer | 3 | Returns the player's bar to a neutral state (effects such as Wither or Amplify). | Purchased from Band Goods in Bopstead (New stuff arrived!) | |
| White Noise Machine | 3 | Returns the enemy's bar to a neutral state (effects such as Wither or Amplify). | Purchased from Band Goods in Bopstead (New stuff arrived!) | |
| Positive pull-string Pal | 6 | Removes all negative measure effects from the player's bar. | Purchased from Band Goods in Bopstead | |
| Negative pull-string Pal | 6 | Removes all positive measure effects from the enemy's bar. | Purchased from <o> in the Pop-Up Shop in Hellblivion | |
| Quakstak Burgermuffs | 3 | Reinforces all measure effects on the player's bar with Shield (prevents an effect from being overwritten once). | Purchased from Band Goods in Bopstead (New stuff arrived!) | |
| Diva Music Box | 2 | Empowers 2 measure effects on the player's bar (Increases the effectiveness of that effect). | Treasure in Zone 3 of TillaTek CYBERJUNGLE | |
| Audio Greeting Card | 2 | Empowers 2 measure effects on the enemy's bar. | Given by Mazzi in the Hoho Post Office after escaping TillaTek CYBERJUNGLE | |
| Flipped Cap | 3 | Inverts 2 measure effects on the player's bar (they have the opposite effect). | Treasure in the east of the final area of the Lower Locks. |
Key Merch
Unlike other merch items, key merches are not consumable products. Although they can be obtained just like regular merch and are listed under the merch menu (as key items), they unlock storylines and game mechanics. Certain side gigs also require collecting key items.
Restock
After the first two opportunities, restocking costs more and more bops per stock missing as the game progresses.
List of restocking locations in the game in order of appearance (temporary locations are in italics):
- Next to the Soothing Fish Spring in Tonewood Forest (free restock)
- In The Wet Beak in Claire's Hair (free restock)
- In the first bigger lounge in Bass Basement
- Cross section in Bass Basement between Cuttleboys and the broken aquarium
- On Deck 6 of The Bus
- At the reception of Deck 10 of The Bus
- Across the elevator on Deck 16 of The Bus
- At Sid's Clinic in Hoho
- In Zone 1 of TillaTek CYBERJUNGLE
- In Zone 5 of TillaTek CYBERJUNGLE
- In the living quarters of TillaTek CYBERJUNGLE
- In Camping B of Hellblivion
- Behind the stage in Hellblivion
- At the entrance of Claire's Hair (Lower Locks)
- In the backstage of the Battle of the Bands
Retroactively all Saeva tents are also restock points (even those where Bocks was not initially present).
Stock expansions
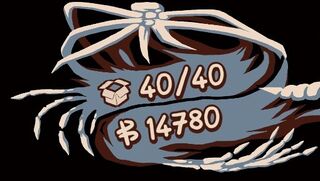
Players start with 15 Stock capacity. This can be expanded up to 40 by obtaining Stock expansions.
The list below is based on a Steam guide by Oncle Shaytan:
- Shops
- 2 in Band Goods in Bopstead
- 1 in Evil Goods in Hoho
- 1 in the Pop-Up Shop in Hellblivion
- In a chest at the far right of the first screen
- In a chest at the top right of Claire's screen
- In a chest hidden behind Madam Bouffant's son Hadley
- In a chest in the zone at the right of The Wet Beak
- In a chest in the zone at the left of The Wet Beak (that part is mostly covered, you will need to figure out how to reach the chest in the bottom right part)
- In a small room left of the 1st tent (on the actual screen where the tent is)
- In the room south of the 1st tent, directly at the right of the entrance.
- Easy to miss: In the room south of the 1st tent. Go southwest past the bookshelves and search for a hole in the bottom wall, left of the tv
- In the room with the 2nd tent and the two cuttleboys. Go diagonally down and to the left from the tent.
- In the corridors of the 11th floor
- In the corridors of the 14th floor, in a south west corner
- In a room on the 14th floor. This one might be missable, since the broken door ends up hiding the suitcase partially
- In zone 1, next to the couch
- In zone 4. One of the rooms has a narrow cable pillar near the exit door, there is a chest invisibly hidden behind it
- In zone 5. There are a lot of enemies in this room, and the computer to activate TillaTek's legendary and the door leading to the Kick King nemesis, so it's easy to miss the cardboard in the middle of the room
- 1 very hard to miss since it's in the toilet at the entrance
- 1 very easy to miss, in a toilet in the secret passage left of the bar. When you leave the bar, hug the opposite wall while going up, there is a passage to the left
- Backstage-y looking area (both are in the second part)
- At the end of the teal path
- At the end of the yellow path
- In the first room after the tent room. As soon as you enter, wait. There is a moving platform going up, leading to a chest.
- Exit the second room (after the tent room) by the bottom right door, go south and take the first platform on the right, going down (see also: Zoddronite's Gameplay Walkthrough at 6:13:31).


